A cracking timber deck out the back? It’s basically the great Aussie dream. But keeping it looking mint takes some doing. Between summer barbies and winter downpours, the wood cops an absolute hiding.
You know what’s non-negotiable? Deck sanding. It’s the secret sauce for banishing splinters, flattening rough patches, and getting the boards hungry for a fresh coat of oil.
The problem is, many of these amateur weekend warriors end up doing way more than they can handle. They pick up an electric tool and start working, not realising that bad skills can severely damage their wood. To stave off a disaster that will be a blotchy mess and also to save your money, here is the big list of the most serious errors that you should definitely steer clear of.
Mistake 1: Attacking Damp Wood
We’ve all been there. You’ve just pressure-washed the boards. The sun finally peeks out, and you’re itching to get stuck in.
Hold your horses. Taking a sander to wet timber is a total recipe for disaster. Why? Wet wood fibres are basically soft mush compared to dry ones. Your machine will just violently chew up those damp spots, leaving you with a shockingly uneven, butchered surface once it dries out.
And don’t even get me started on the sandpaper. Damp sawdust turns into glue, clogging your abrasive belts instantly. You’ll burn through five to ten times as much paper, totally blowing your budget out of the water. Give it a day or two to dry completely.
Mistake 2: Skipping the Prep Sand
Another classic clanger is thinking a quick soapy scrub is enough prep before slapping on some new oil. It isn’t. Coating over tired, weathered timber guarantees a patchy finish that won’t absorb properly or last the distance.
You’ve got to look for the signs showing that your timber deck needs sanding and refinishing. What are they? Think greyed-out boards, old peeling stain, uneven colour, and a rough, splintery feel underfoot. A light prep sand removes that superficial damage. It opens up the timber, giving your fresh oil a solid base to actually bite into.
Mistake 3: Jumping Sandpaper Grits
Then there’s the temptation to cut corners. Going straight from a seriously heavy-duty, coarse-grit paper right down to a fine finish seems like a clever time-saver, right?
The mistake here is huge. Not using grit papers results in large, ugly scratches. They may be hardly visible on the bare wood, but once you put your stain on the surface, those swirl marks will become very visible. It is very important that you work step by step. You should get rid of the worst part with the help of coarse paper (e. g., 80-grit), followed by a medium one, and only then finish with a fine grit.
Mistake 4: Getting Carried Away (Over-Sanding)
There is a limit to it, though. You’ve got to be careful not to overdo it. For example, continually sanding your deck until it is as smooth as an indoor dining table. Very easy to do!
If you buff the wood down to a really high level (grits over 150), you, in fact, shut the pores completely. The finish will just remain on the surface instead of being absorbed. Plus, going completely rogue with the sander physically shaves the boards down. Thin, fragile wood is weak wood. It becomes an absolute magnet for moisture penetration, cracking, and rot. Stop when it’s uniformly smooth.
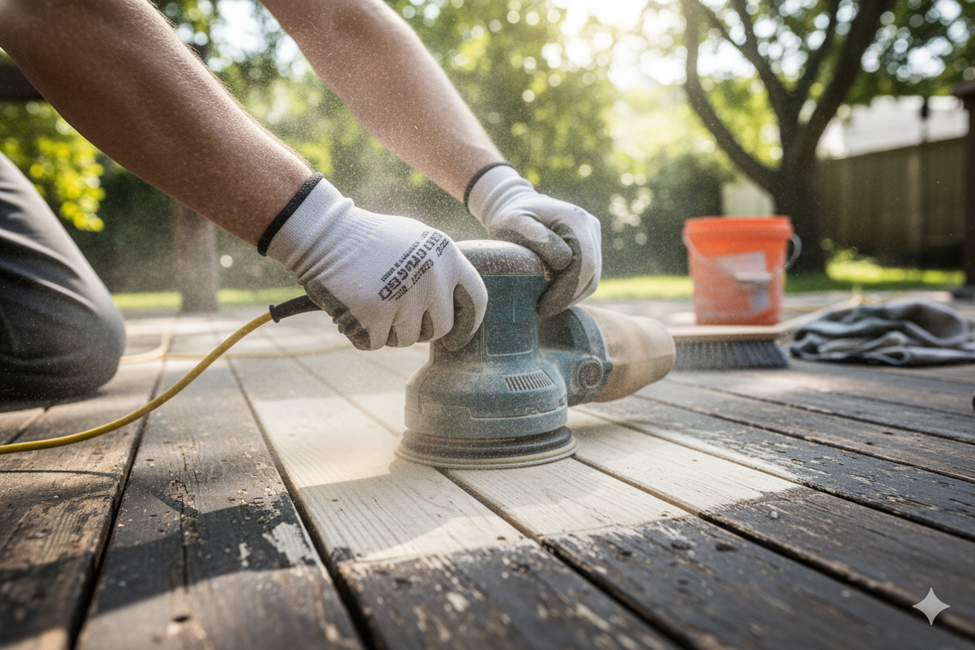
Mistake 5: Manhandling the Machine
Driving the sander takes a bit of finesse, too. Pushing down like your life depends on it? That just generates crazy heat, leaves deep swirls, and wrecks your expensive sanding pads. Tilting the machine at an angle to aggressively attack a stubborn spot is another brilliant way to completely gouge the timber.
Just relax. Rely on the heaviness of the machine itself to do the hard work. Keep it completely flat. Take your time, approximately one inch each second, and simply allow it to slide as the natural direction of the grain. But remember that when using the sanding machine, you should turn it on only after you have placed it on the wood and switch it off before removing it from the wood.
Mistake 6: Failing the Final Cleanup
You’re pretty much done. Be careful not to slip up right before the end by doing a really sloppy cleanup. Leaving a thin layer of dust on the deck is a big mistake for beginners. Those little dust particles work as a barrier, making it impossible for the new stain to properly stick. A messy, clinging mess is what you’ll get otherwise. Try a shop vacuum first – maybe even a leaf blower – to clear off the bulk of the junk. Then go over each plank slowly, using a tack cloth to clean it completely.
Final Thoughts:
Achieving a perfect finish needs quite a bit of perseverance. You have to honour the method, move logically through the grits, and be gentle with your instruments. Mastering this basic step is what ensures long-lasting protection for your boards against the harsh Australian climate.
If all this seems like way too much work to you, or your boards are so worn out that you wouldn’t even recognise them, don’t give up. Call for reinforcements. Reaching out to deck sanding specialists in Melbourne is a way without a thread to get rid of stress and have a wonderful time. Have yourself a cold drink and just chill out!